Open beta · Curriculum live
All four lessons are populated — eight curated reference photos chosen specifically for what each one teaches. The subjects span age, ethnicity, and gender deliberately, because different facial structures teach different observational skills. Click any photo to use it as your reference in the app.
The point of practicing with curated photos isn’t to learn how to draw those photos. It’s to develop a seeing skill that transfers to your own subjects. Each lesson isolates one observational skill and gives you two reference photos that teach it cleanly — without the noise of competing variables.
Work through the lessons in order. They build on each other: anchor proportion (Lesson I) is the foundation, shadow shapes (Lesson II) are how the form gets blocked in, edge variation (Lesson III) is how it reads dimensionally, and form turning (Lesson IV) is how the head sits in space. Each lesson teaches the next one’s prerequisite.
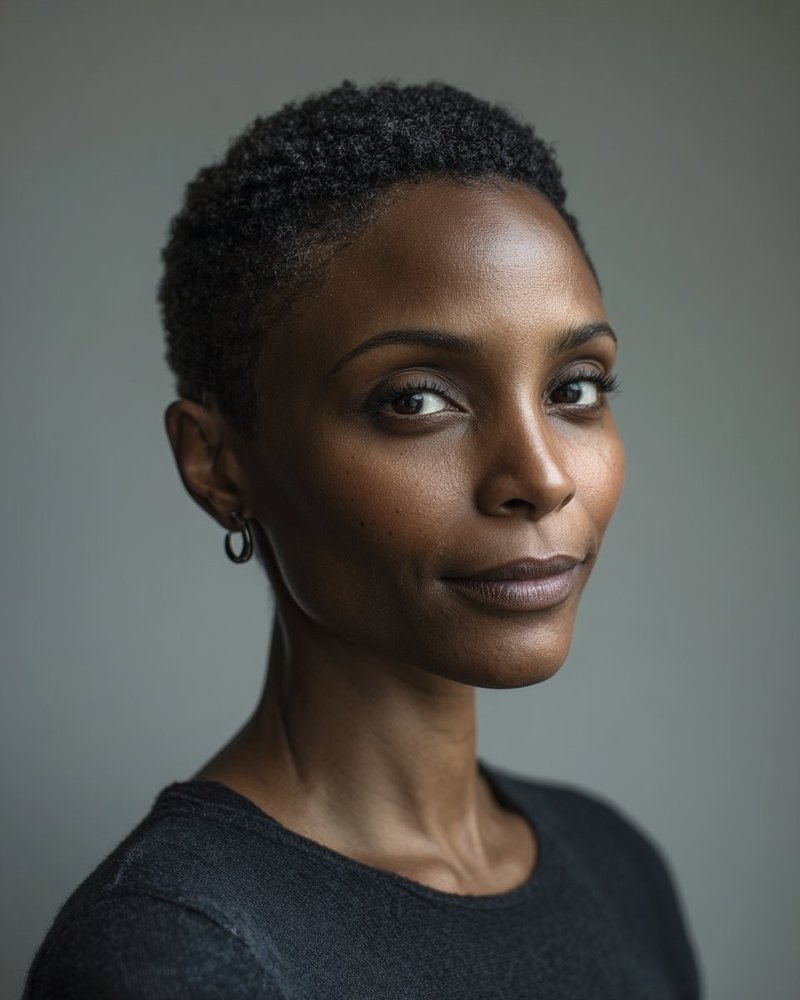
Lesson I
The Simple Read value tiers, nothing more.
Learn to identify the four discrete value tiers in a portrait. Squint at the photo until detail blurs. You should see only highlight, midtone, shadow, and accent. Block them in as flat shapes before adding anything else.
What to look for: a quietly-lit photo with mid-tonal range. The lit side reads as midtone-to-highlight. The shadow side reads as shadow. The accents are small — pupils, dark hair, the deep shadow under the chin.
Soft window light produces a clean read across all four tiers. The shadow under the brow and jaw is the accent — everything else lives in midtone and highlight.
Calm even light, no drama. The hair reads as a single dark shape; the face splits into clear midtone and a subtle shadow side. Practice naming each tier before drawing anything.
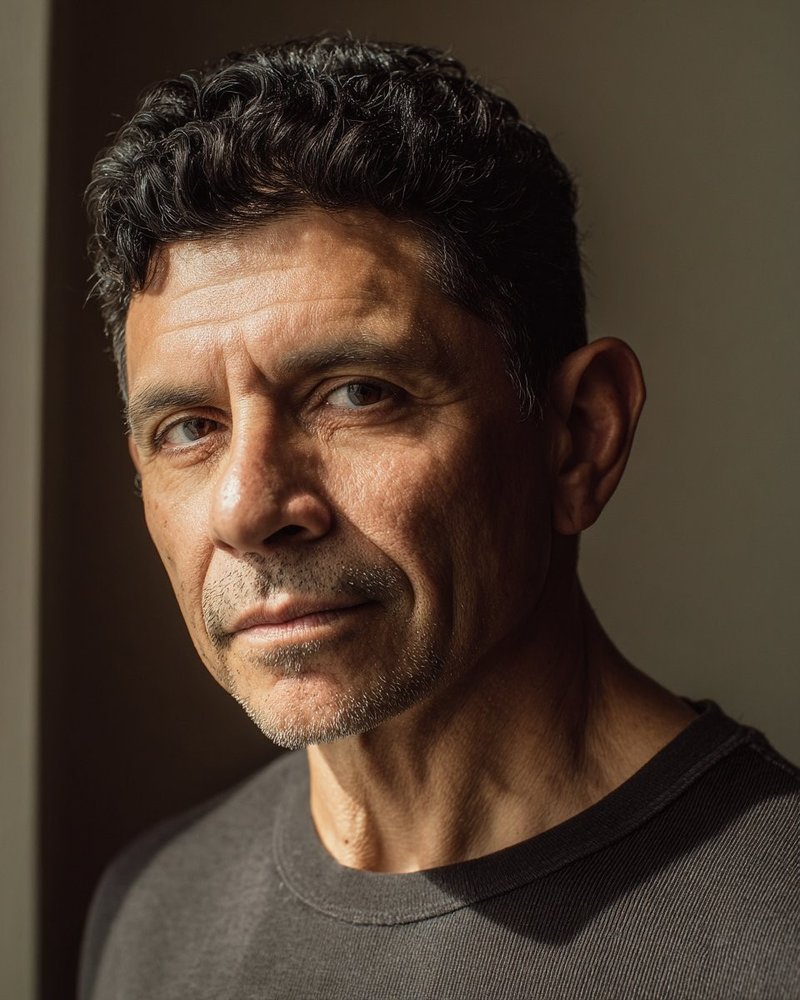
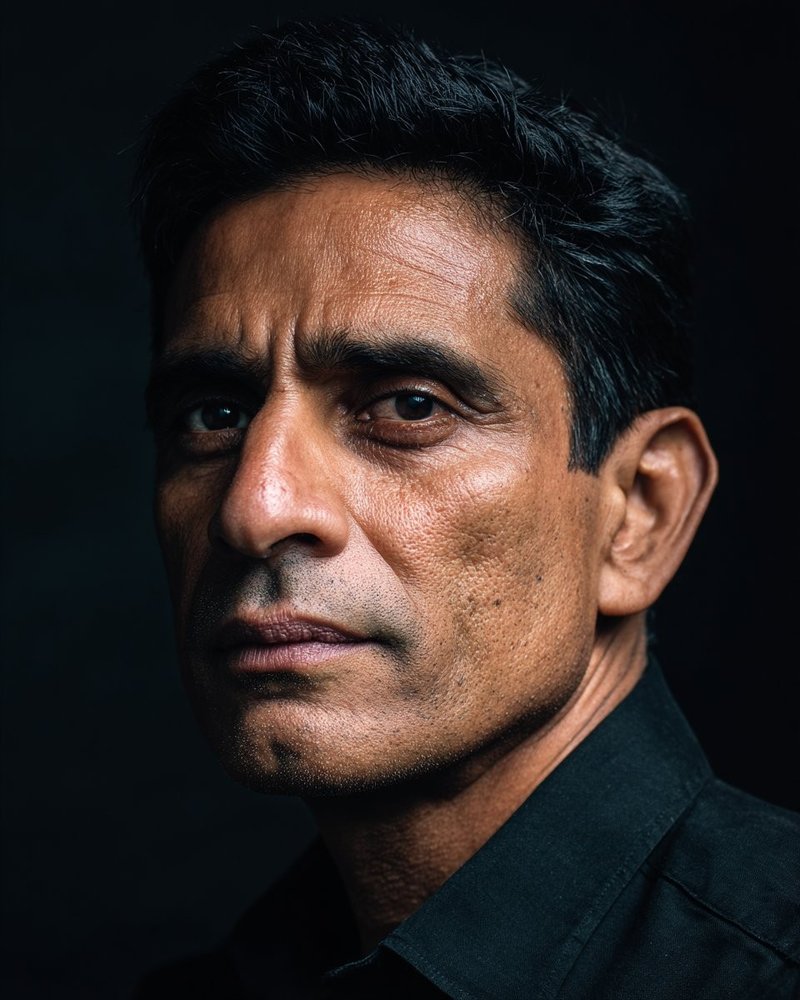
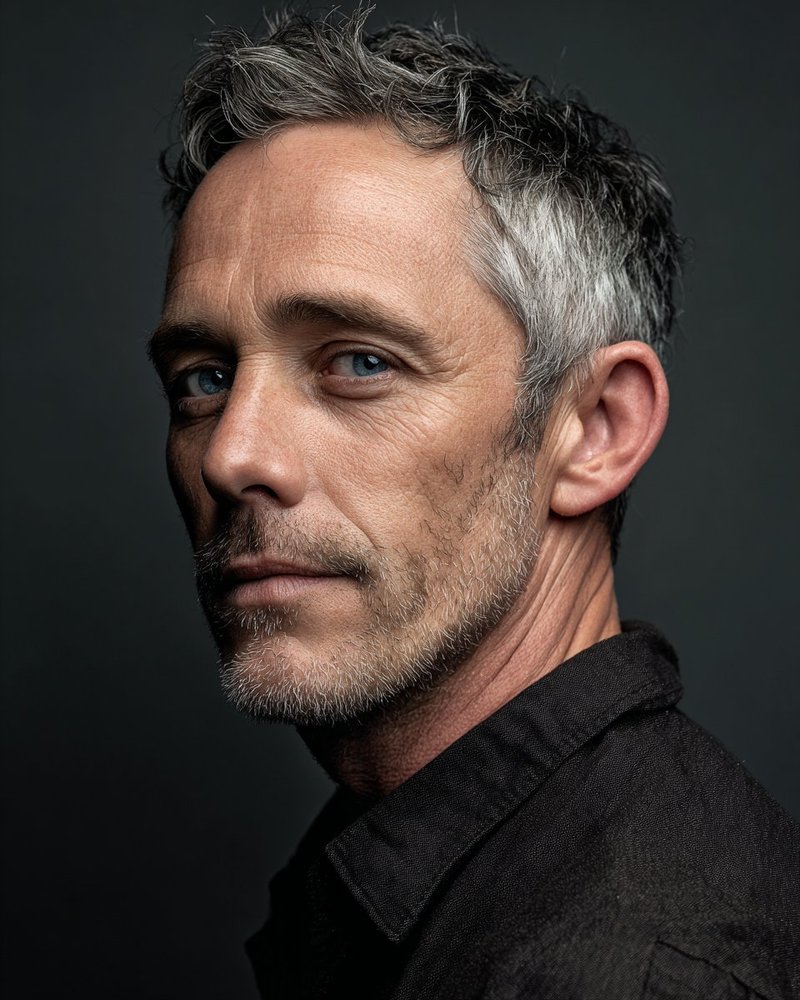
Lesson II
The Connected Shadow one shape, not many.
Learn to see the shadow side of the face as one connected mass — not as separate features. The shadow on the cheek connects to the shadow under the jaw, which connects to the cast shadow on the neck. Treat them as a single shape.
What to look for: strong directional lighting where the shadow side covers 30-50% of the face. Squint and verify the shadow reads as one continuous shape, not a collection of patches.
Textbook Rembrandt lighting. The entire left half of the face is one shadow shape — temple, cheek, jaw, neck. Block it in as a single silhouette before any feature work.
Same lesson, different geometry. The shadow side is on the camera-right half. Trace the shape: it runs from temple to cheekbone to jaw without breaking.
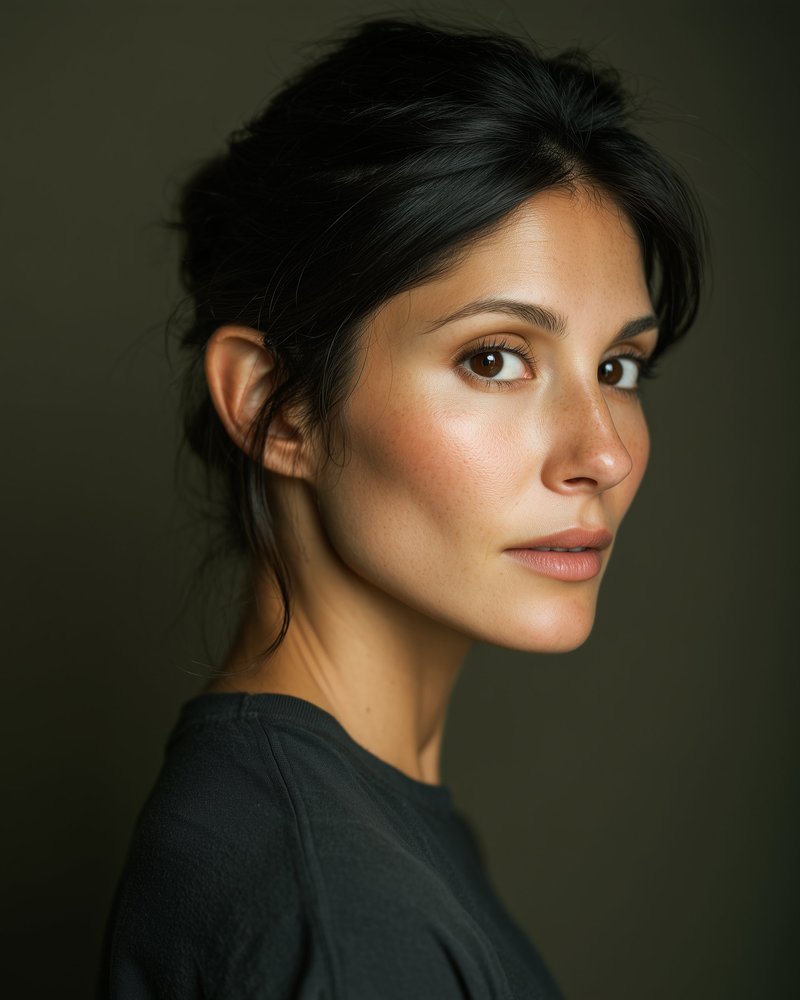
Lesson III
The Lost Edge where to commit, where to disappear.
Learn to see edge variation. Some edges are hard (sharp value transitions), some are soft (gradual fades), and some are lost entirely (the form melts into shadow or background). If you outline everything equally, the drawing reads flat.
What to look for: hair fading into a similar-value background — that's a lost edge. Cheekbone meeting shadow side with a soft fade — that's a soft edge. Eye line and mouth seam staying sharp — those are hard edges.
The dark hair on her left side blends into the background — that's a lost edge. The eye line and lip line stay sharp by contrast. Don't outline what should disappear.
A subtler version of the same lesson. The dramatic hair-into-background fade is replaced by gentle softening throughout — only the eyes commit to a hard edge. Lost edges aren't always dramatic; they can be quiet.
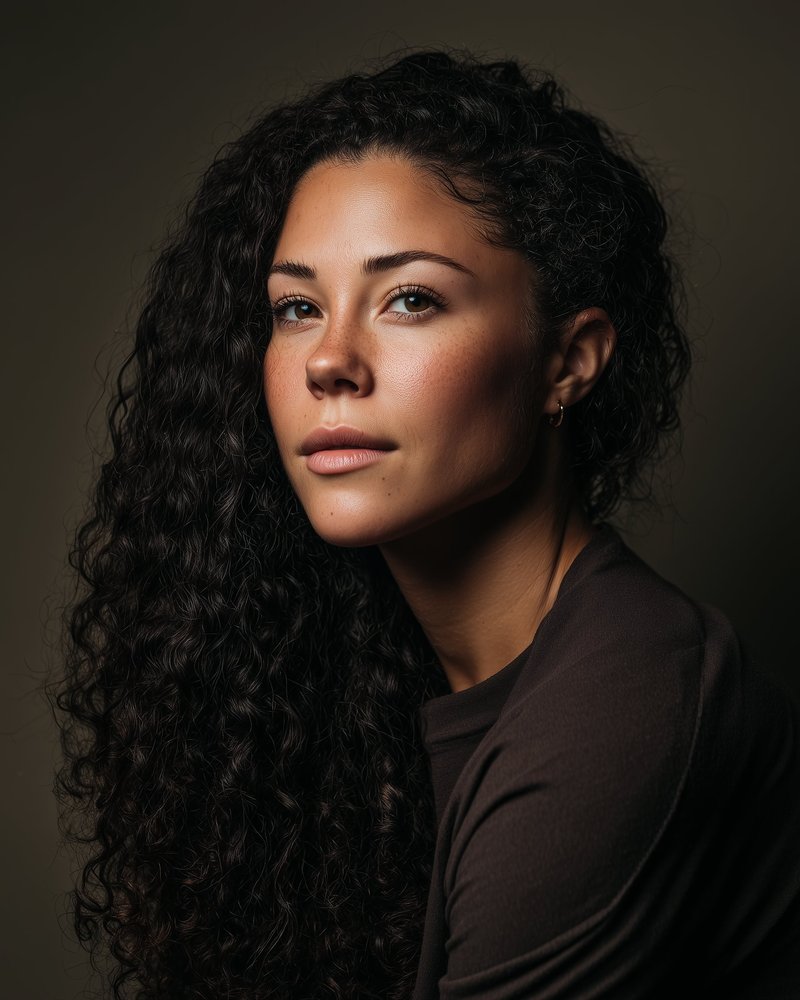
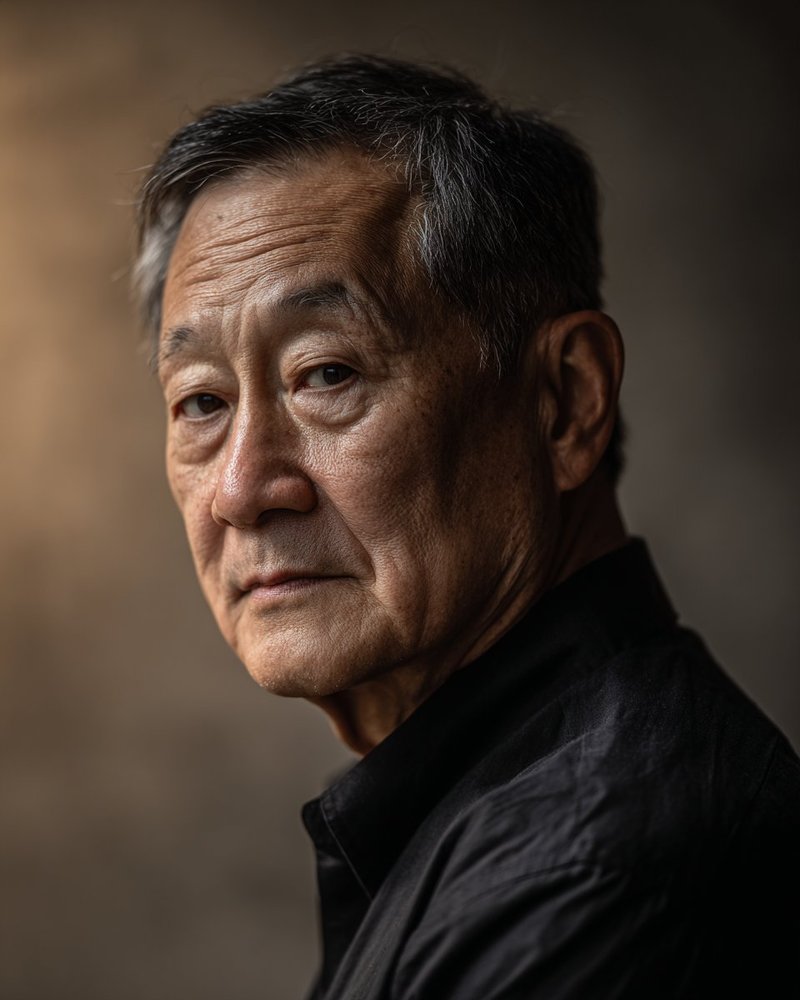
Lesson IV
The Form Turn a head rotating in space.
Learn to see the head as a 3D form, not a flat shape. When the head rotates, the form centerline curves with it — from forehead to nose bridge to philtrum to chin. The curving centerline is the strongest indicator of head pose.
What to look for: a 30-60 degree head rotation, with light source revealing the rotation. Imagine drawing a vertical line from the top of the head down through the chin. Does it curve? It should.
Trace the centerline from the part in her hair down through the bridge of the nose, philtrum, and chin. It curves with the rotation. That curve is the strongest indicator of pose.
Same skill, rotation in the opposite direction. The light from upper-left catches the bridge of the nose and far cheekbone — both reveal the head's three-dimensional turn. Two photos, two rotations: practice reading pose from either side.
After the curriculum
Once the four lessons feel internalized, work from your own photos. The skills don’t belong to the practice photos — they belong to you. Real practice is drawing many subjects across many lighting conditions until the seeing becomes automatic.